Sensor map pin customization: marker size & using custom images
Use Custom Images for Pins
You can upload a custom image to be shown on the map instead of the default pin marker. To do so:
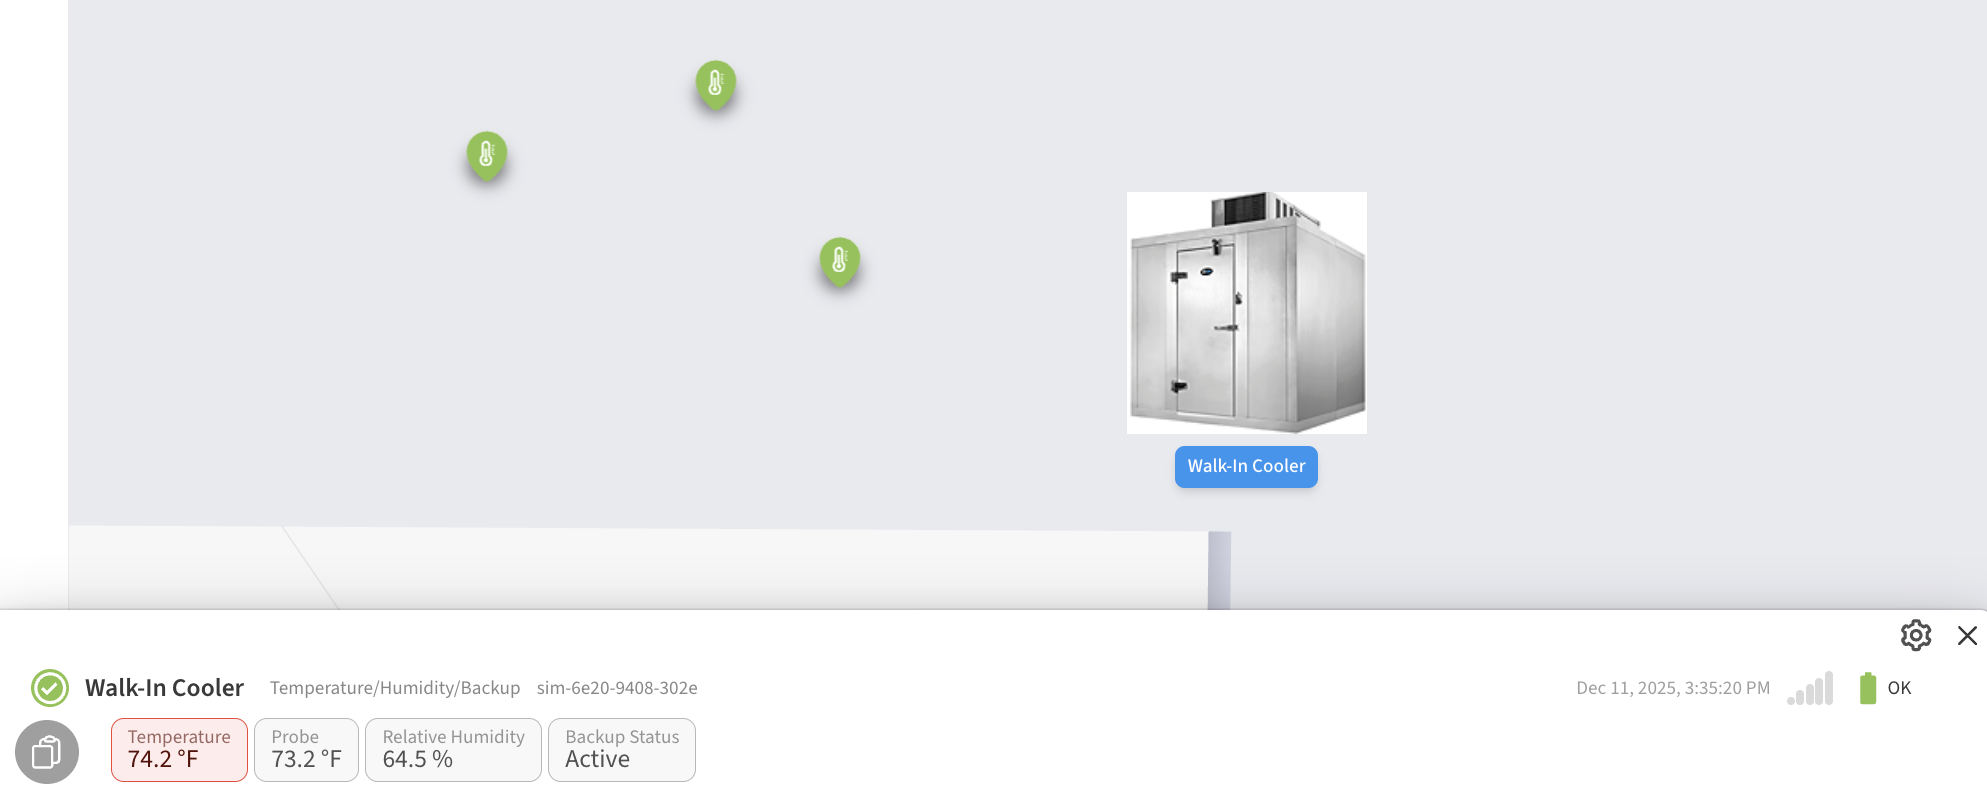
Click on the sensor map pin. A panel will appear at the bottom of the screen showing detail for the sensor associated with that pin. Click on the Settings (gear) icon to access the customization options for that device.

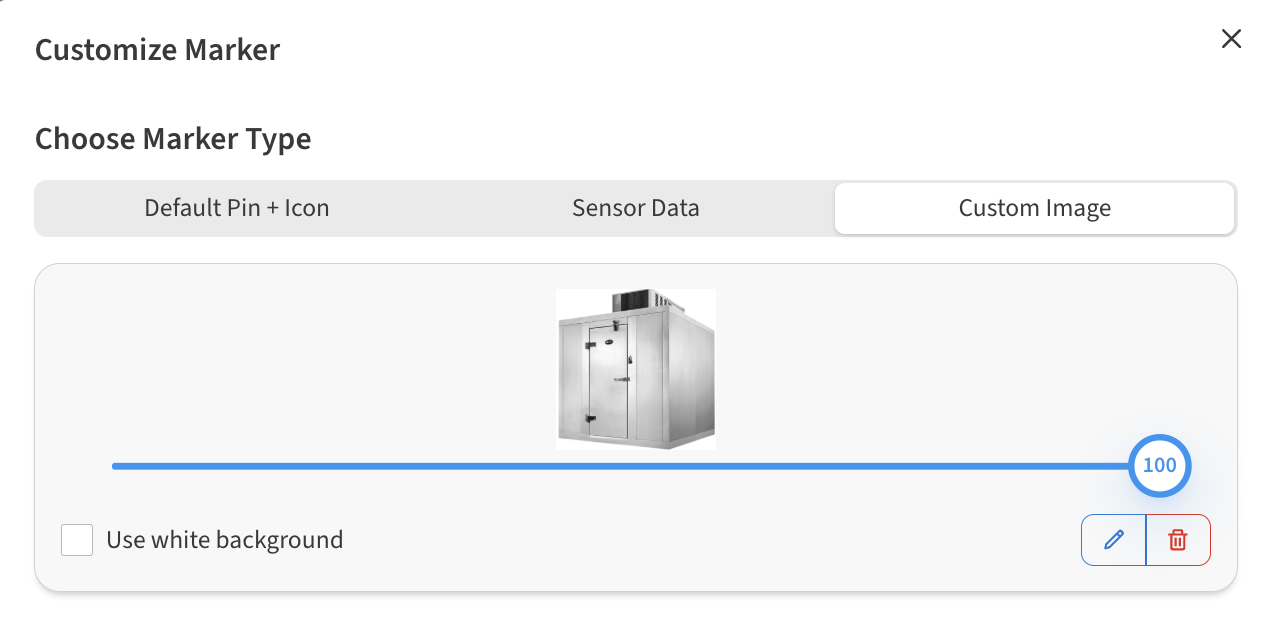
On the Customize Marker dialog that appears, click on Custom Image in the Choose Marker Type area. You can then click/tap the dialog or drag & drop an image to be used for this sensor map pin
Control the size of device markers
You can increase or decrease the size of sensor data labels or image markers on the map. To adjust, simply drag the Size slider in the configuration options.
Access this screen by clicking on the pin marker and opening the settings (gear) icon.
Use the Label Size slider found on the Sensor Data or Custom Image tabs
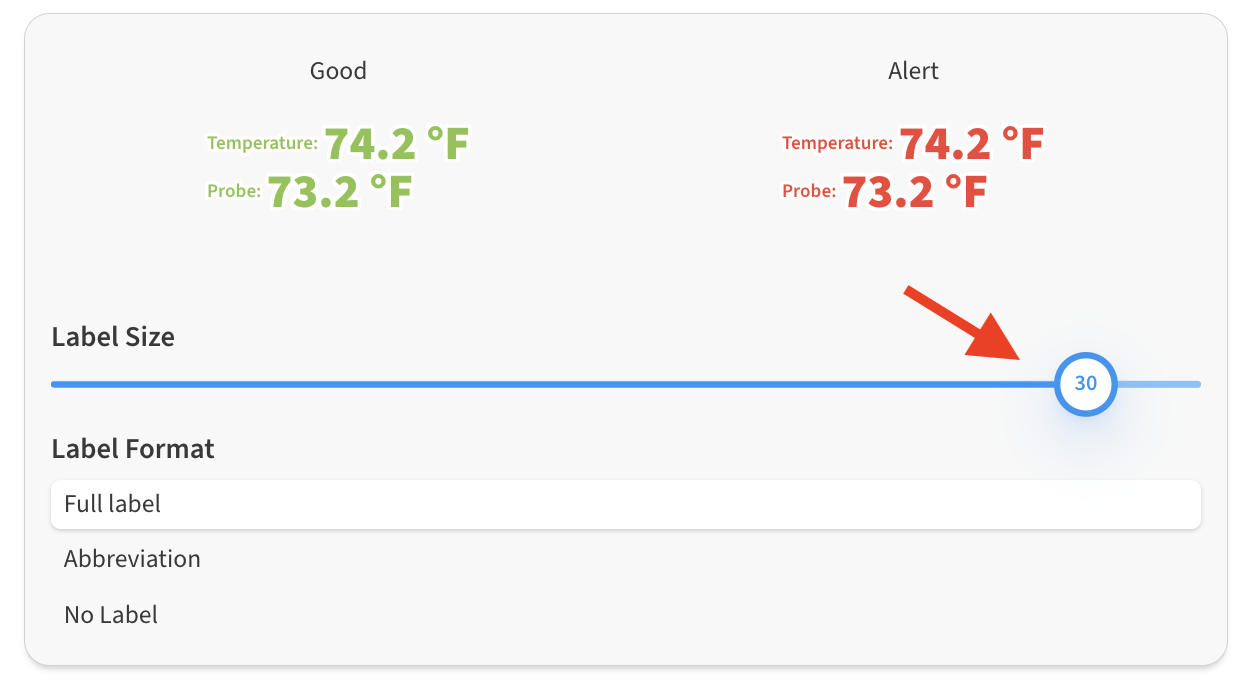
Click Done to save your changes.