Edit Temperature Alerts for a Sensor
Temperature alerts help you stay informed when a sensor reports readings outside your desired range. This guide walks you through how to edit and configure temperature alerts, update who receives alerts, define optional rules, and enable your alert so notifications are triggered as expected.
This help article will show you how to finish setting up a Temperature alert for a newly added device.
1. Editing the Default Alert Created When the Device Was Added
For many hardware models, when a new temperature sensor is added to the platform, the system automatically creates a default temperature alert. This alert is disabled (toggled off) by default so you can customize it before putting it into use.
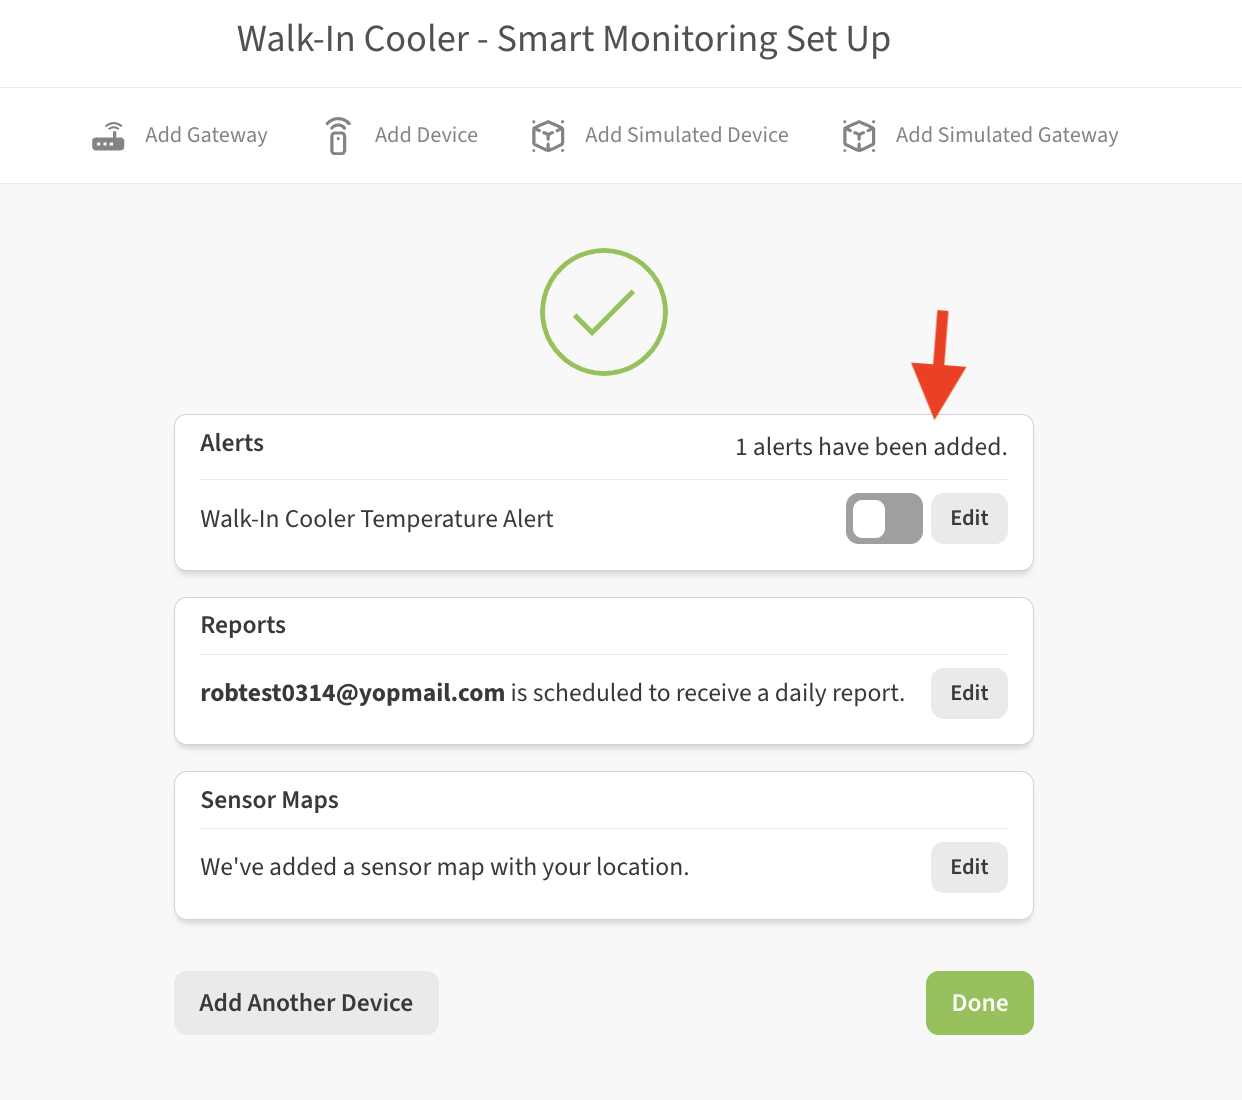
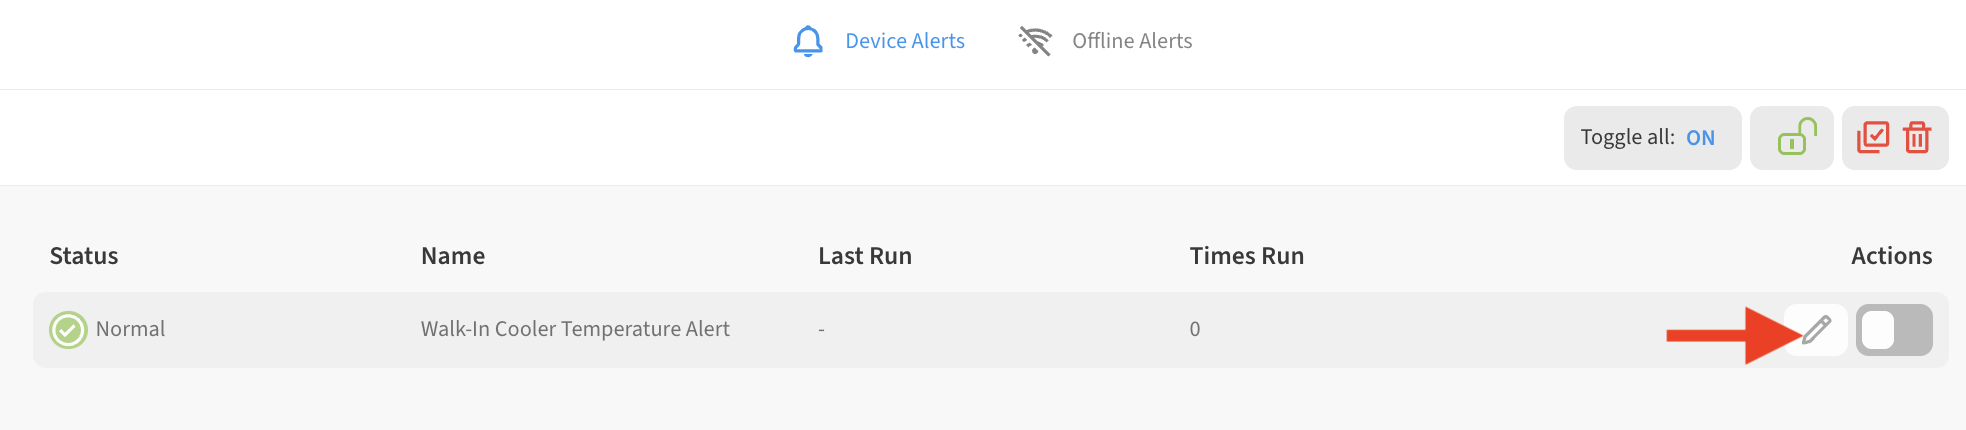
You can edit the default alert by clicking on the Edit button on the screen shown above, or at any time by going to Menu → Alerts and then clicking on the Edit (pencil) icon next to the alert in the alerts list
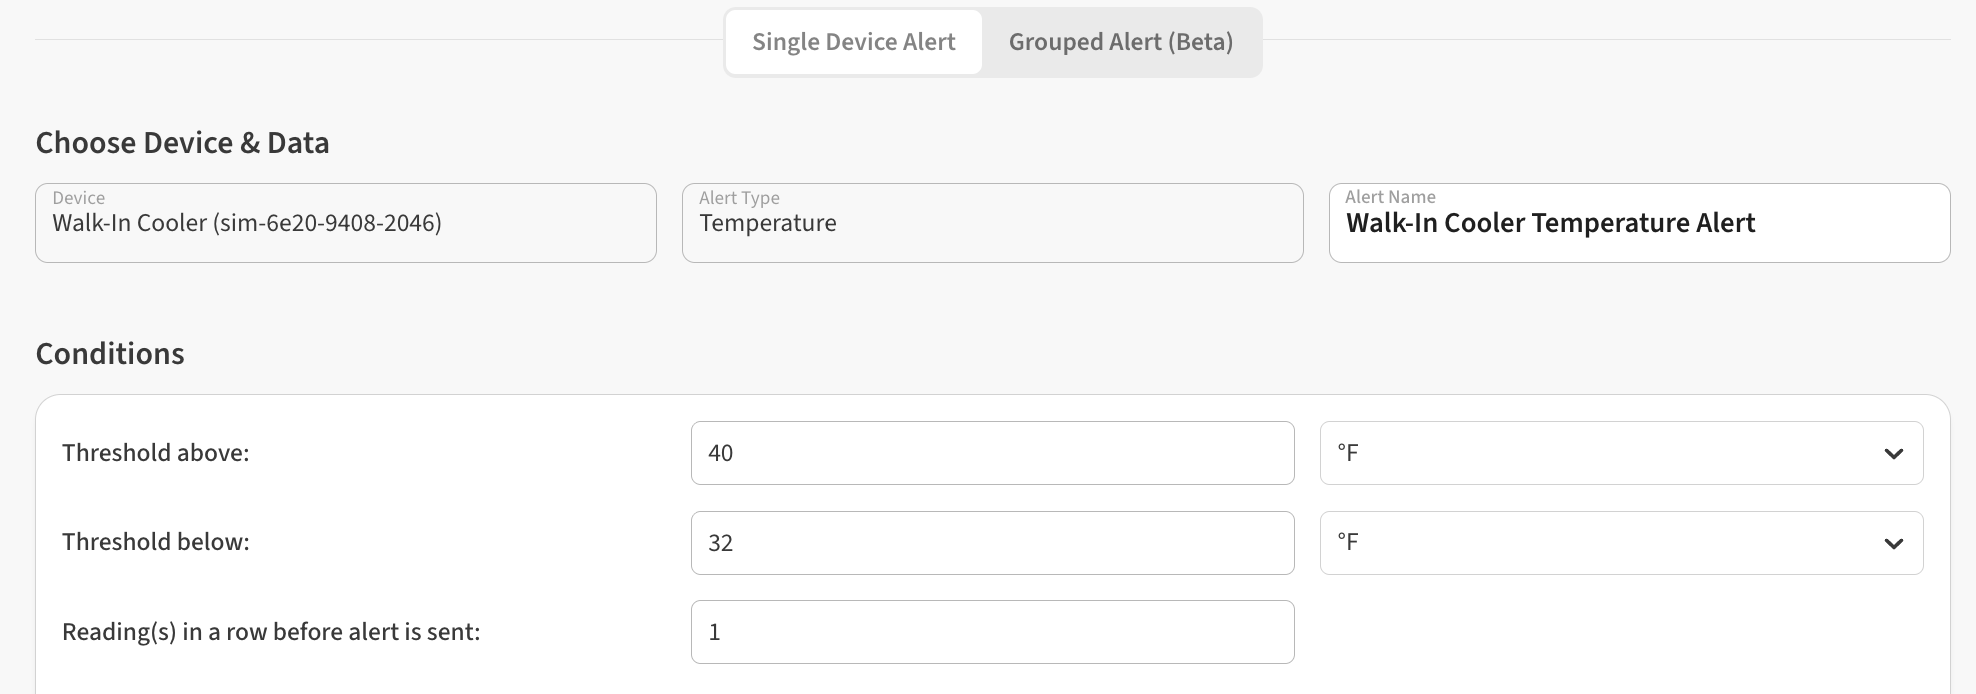
2. Configuring Temperature Thresholds
Your alert will only trigger when temperature readings cross the limits you define. These can be edited on the Conditions area of the Edit Alert page in the Threshold Above/Below fields. You can also set the temperature unit here.
Readings in a row before alert is sent lets you control how many out-of-range readings before the alert triggers. This is useful for avoiding false alarms during defrost cycles or short periods where the door to a refrigerator/freezer may be open in typical daily use.
3. Adding Rules to Your Temperature Alert
Rules allow you to customize how and when alerts behave beyond simple thresholds. Adding a Rule to your alert is always optional. Rules can be added via + button on the Rules section on the Edit Alert page:

Don’t send alert notifications between lets you define a time range when the alert will not send text message or email notifications. This may be useful outside of business hours or in the middle of the night. The system will continue to log temperature readings in this window.
Only alert if condition remains for allows you to set a number of minutes that the sensor must be out of range before triggering an alert. This is useful for avoiding false alarms during defrost cycles or short periods where the door to a refrigerator/freezer may be open in typical daily use.
4. Editing the List of Recipients for Alert Notifications
To edit the list of recipients for an alert notification
Click the Edit (pencil) icon next to the Notify Contact section to open the recipients list for editing
Check or un-check the desired phone number or email setting for each person on the list. If you leave both boxes unchecked for a contact, that person will not be notified via either method.
(optionally) use the + icon in the Notify Contact area to add additional contacts to the account so they can be added as alert recipients. (requires Owner or Admin permission level)
Click Save to save your changes.

5. Enabling Your Alert
Once configured, your alert must be enabled to begin monitoring. To enable your alert, simply toggle the alert’s on/off switch to ON (green) on the alerts list
