
How to schedule notification days and times for each alert recipient
The following article explains how to set up day-and-time notification schedules for individual alert recipients. This lets you control exactly when each contact receives alert notifications, so the right person gets notified at the right time, and no user gets notified outside of their desired dates and hours.
Setting up a notification schedule for a recipient
Open the alert for editing via Menu → Alerts and click the Edit (pencil) icon next to the alert you want to modify.
In the Notify Contact section, click the Edit (pencil) icon, then locate the recipient you want to set a schedule for in the recipients list.
Click the clock icon in the Days & Times column next to that recipient. This opens the schedule dialog.

The scheduling dialog displays all seven days of the week (Sunday through Saturday).
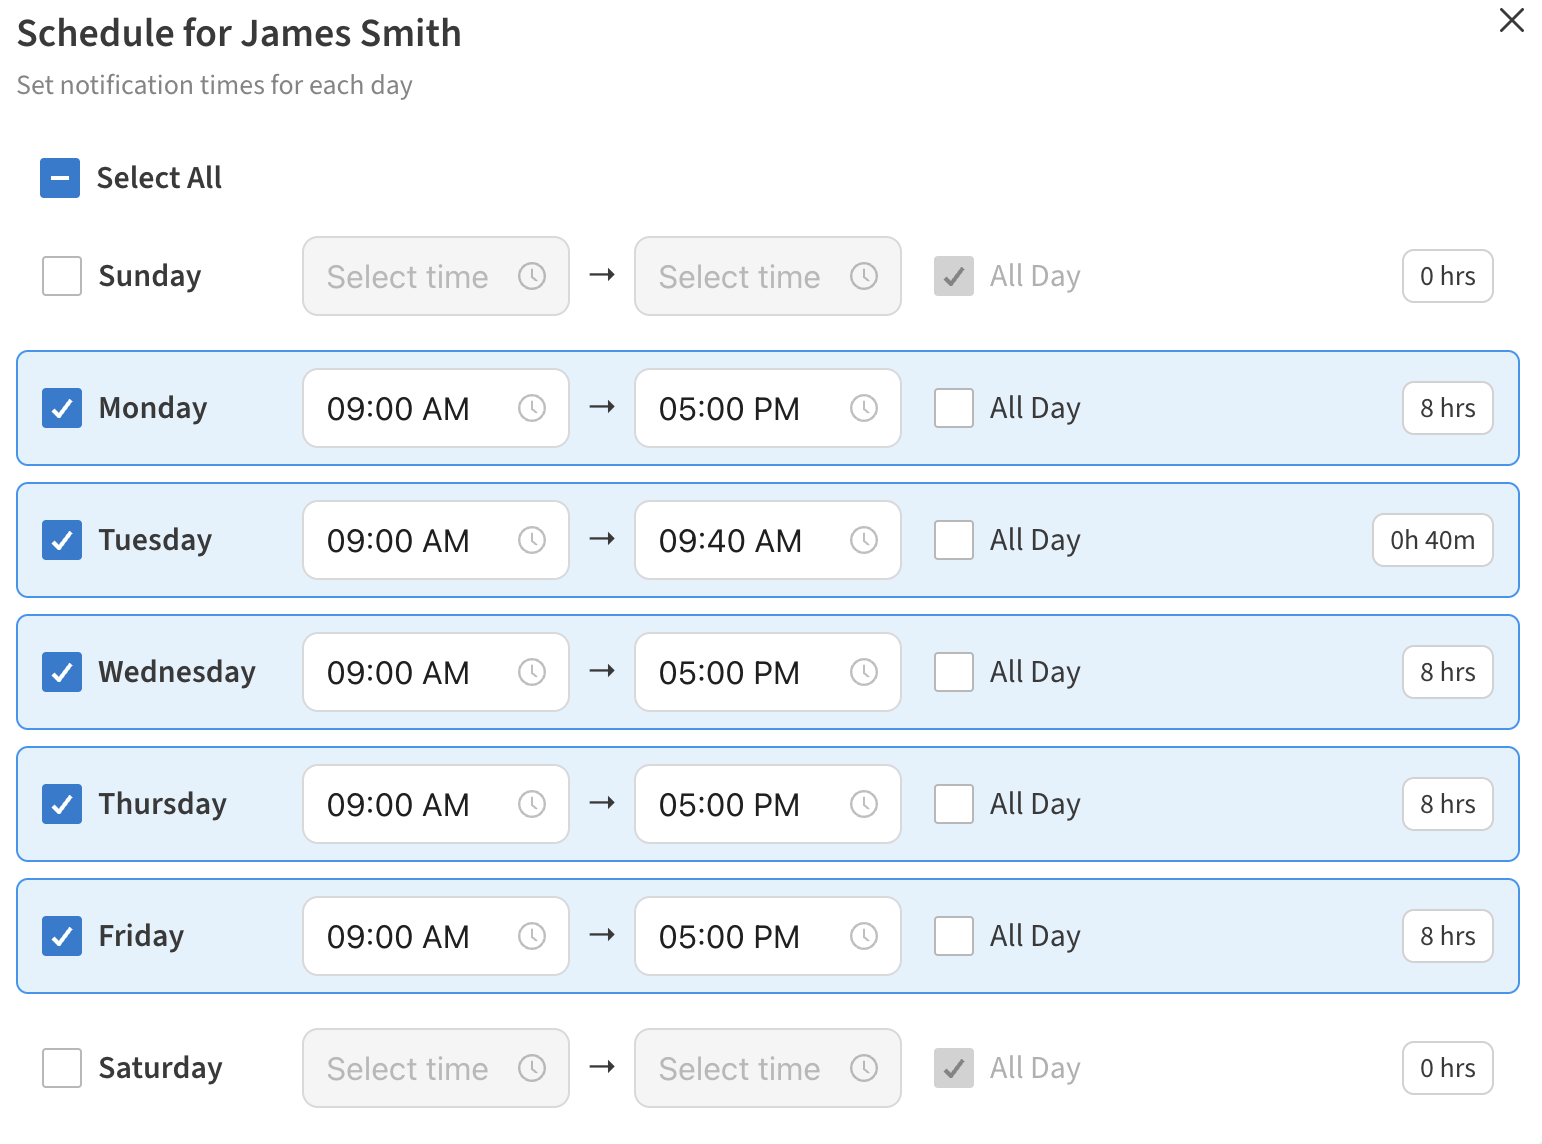
For each day:Check the day to include it in the schedule. Uncheck a day to exclude it entirely.
To receive alerts all day, leave the All Day checkbox checked for that day (this is the default setting).
To set a specific time window for a day, uncheck All Day and enter a start time and end time (for example, 9:00 AM to 5:00 PM).
Use the Select All checkbox at the top to quickly check or uncheck all days at once.
Click Save Schedule to save the recipient's notification schedule.
If you do not set a schedule for a recipient, that contact will continue to receive alerts around the clock — no changes are needed for existing alerts.
Applying a schedule to other contacts
After configuring a schedule for one recipient, you can apply the same settings to other contacts on the alert:
In the schedule dialog, scroll down to the Apply settings to other contacts section.
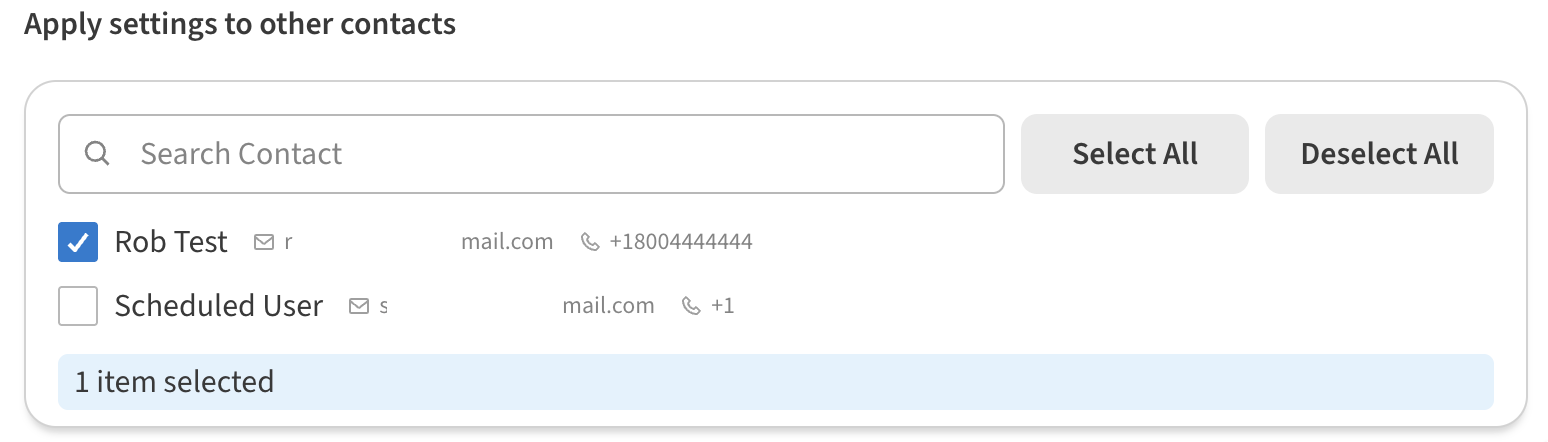
Search for or select the contacts you want to apply the same schedule to.
Use Select All or Deselect All to manage the list quickly.
Click Save Schedule. The selected contacts will receive the same day-and-time configuration.
Handling overnight shifts
Each day's time window applies to that calendar day only. To cover an overnight shift, set up both days. For example, for a 10:00 PM to 6:00 AM shift: set Monday to 10:00 PM – 11:59 PM, and Tuesday to 12:00 AM – 6:00 AM.
How alert schedules interact with the global "Don't alert between" rule
The Don't alert between rule (if applied to an Alert) still takes priority. If that rule suppresses alerts at the current time, no one receives a notification — even if their individual schedule would allow it.