Setting your Chirpstack LNS instance to send and receive data from myDevices
If you are using your own Chirpstack LNS instance, you will need configure it to send data and receive sensor downlink requests with myDevices. Here’s the steps to complete so you can start visualizing data in your app, send data out via integrations and make sensor firmware configuration changes via downlink.
CONFIGURE YOUR CHIRPSTACK LNS INSTANCE TO SEND DATA & RECEIVE DOWNLINK REQUESTS
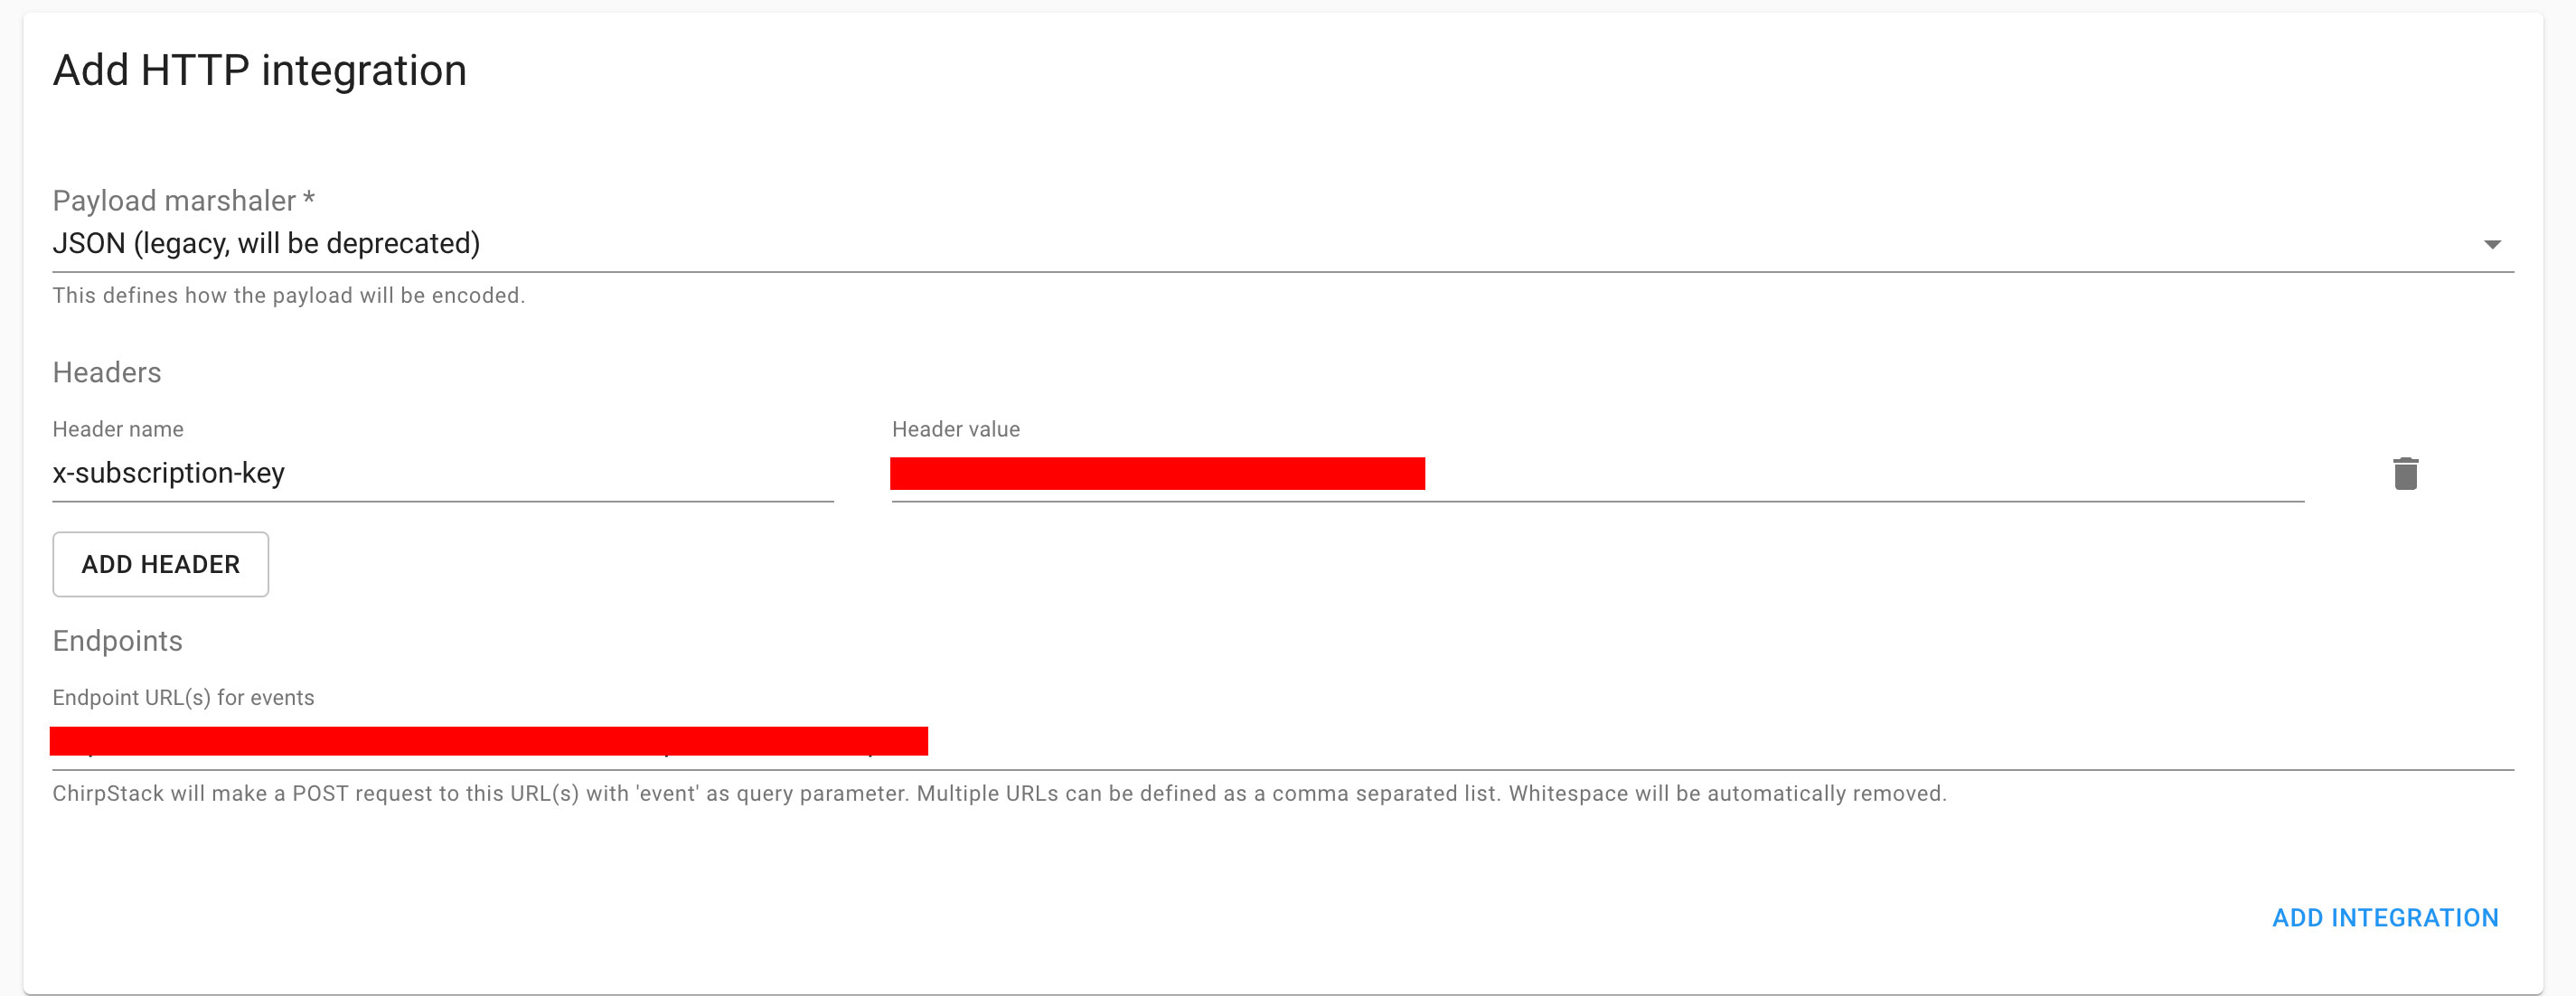
Step 1: Add X-Subscription key: Please enter the x-subscription key that was provided to you in the Header Value field.
Step 2: Add Endpoint URL: Please enter the endpoint URL that was provided to you in the Endpoints URL field.
Step 3: Please send to myDevices your Chirpstack LNS Instance URL.
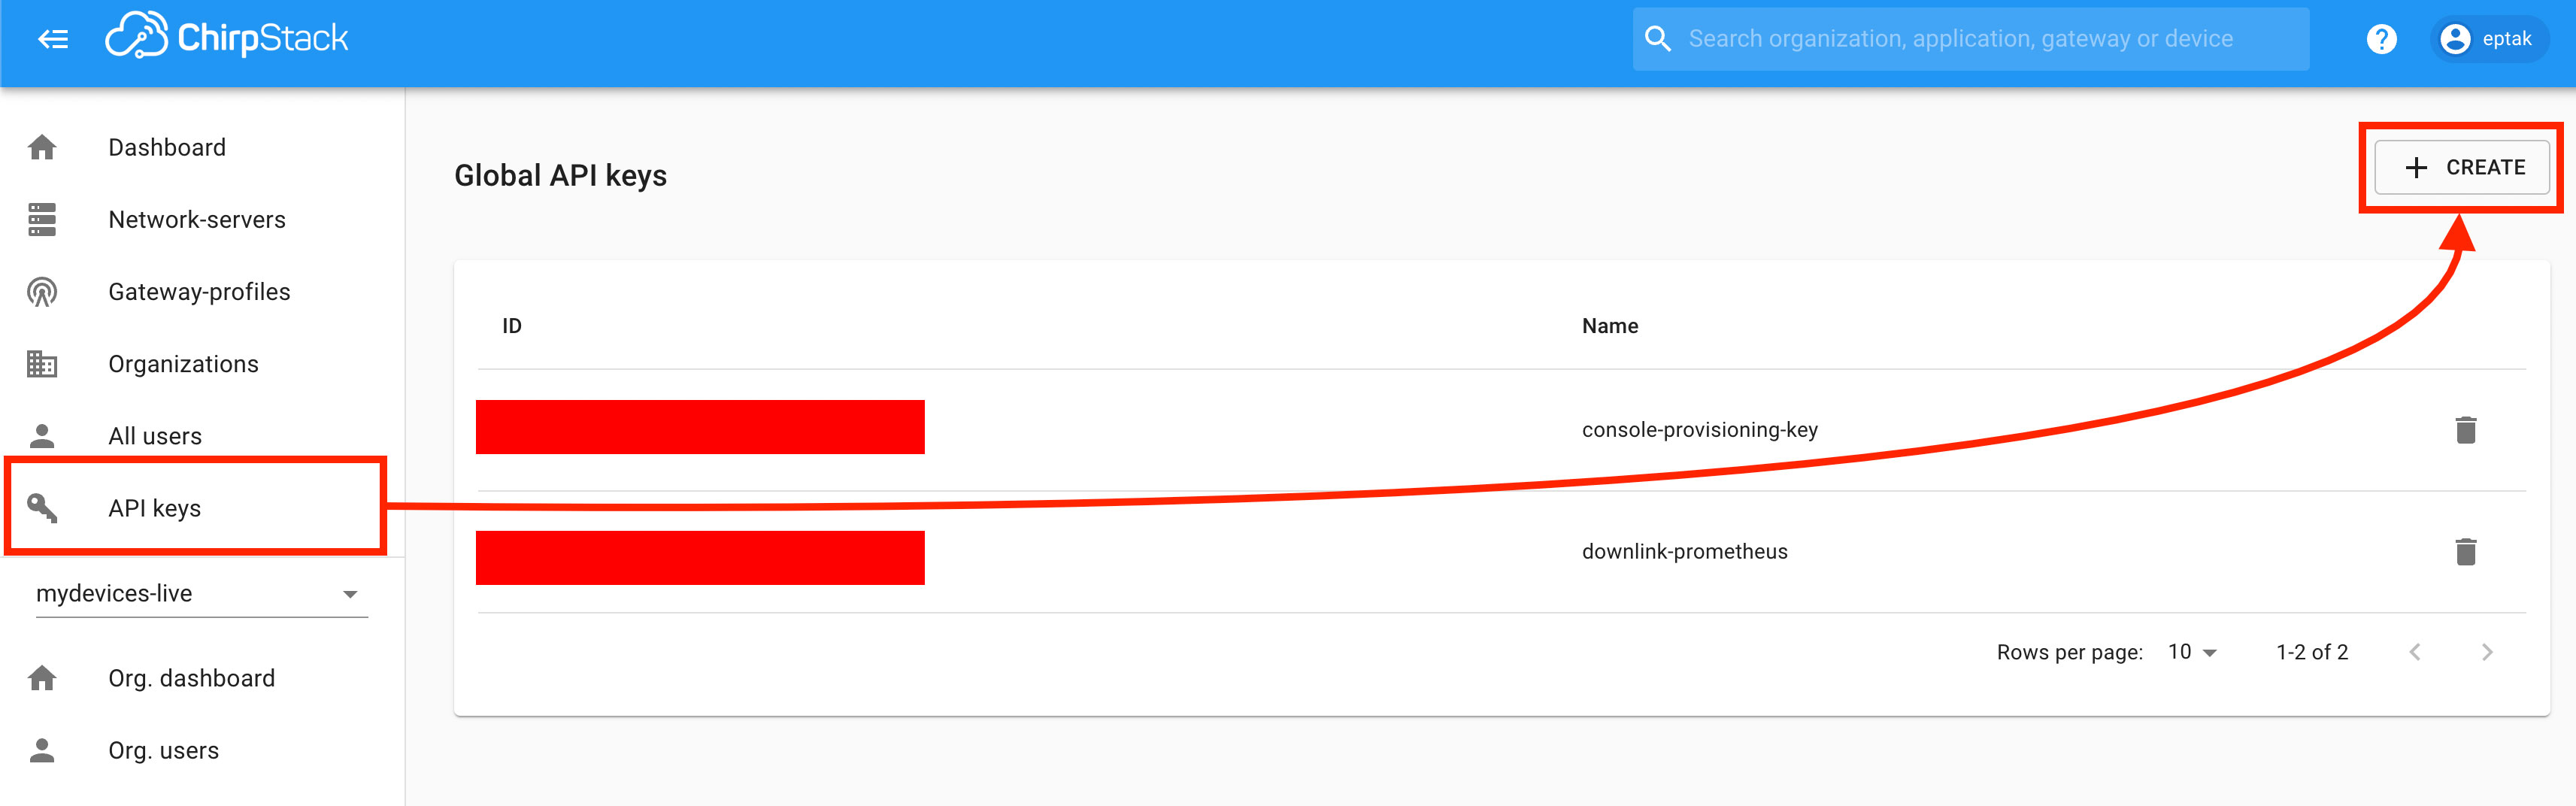
Step 4: Please generate and send to myDevices your Chirpstack Global API Key: This can be found by clicking on API keys from your left side nav bar. Click the Create Button in the top right below the user menu.
After generating this key, please provide this to myDevices along with your Chirpstack Instance URL.
Once you’ve completed, as next steps Upload devices to your Console and visualize data using your white-label app.