Edit Report: Selecting Devices or Reading Times
By default, a report created in a Location will contain all devices in that location, and all readings from those devices in the report time period. This can result in a lengthy report in cases where there are many devices in a location, or where one device generates many data points.
You can use the optional Devices & Reading Times section to specify only the devices you want in the report, and for each device, if you want all the readings, or just a sample from specific time points.
Select Devices to be included
When creating or editing a report, you can choose which devices are included by using the Choose Devices field. By default all devices and all data points are included. If you want something different in your report, you will need to select which devices to include.
If you still want All Devices, but to limit the number of data points for them all, open the selection here and choose the Select All option. You can then customize data points as shown in the next section.

In the example below, we’ve selected two devices to include in the report

Select which data points to include
After selecting which devices you want to include in your customized report, you can optionally then limit how many data points to include for each.
By default All available data points are included. Limiting the data points included for each device is an optional step that gives you greater control over your report.
To customize the data points for a device, click on Set Reading Times to show more options.

Setting custom reading times
After expanding the reading times for the device, you can then add one or more data points in your report by clicking on the + icon. You will then be able to customize the Time for that data point.

You can have as many reading times as you want.
For example, to setup a report with 2 data points, simply click on + twice and then specify the correct time to match for both data points.

Note: if there isn’t an exact match for the reading time you select, the report will search in a window around that reading time for the nearest data point and include that in your report.
For example, if you have a temperature sensor checking in at 8:50, 9:10, 9:30, 9:50 and you specify a 9:00 reading time, it will choose either the 8:50 or 9:10 reading as this is closest to 9:00.
Be sure to remember to click the Save Reading Times button when you’re done making your selections!
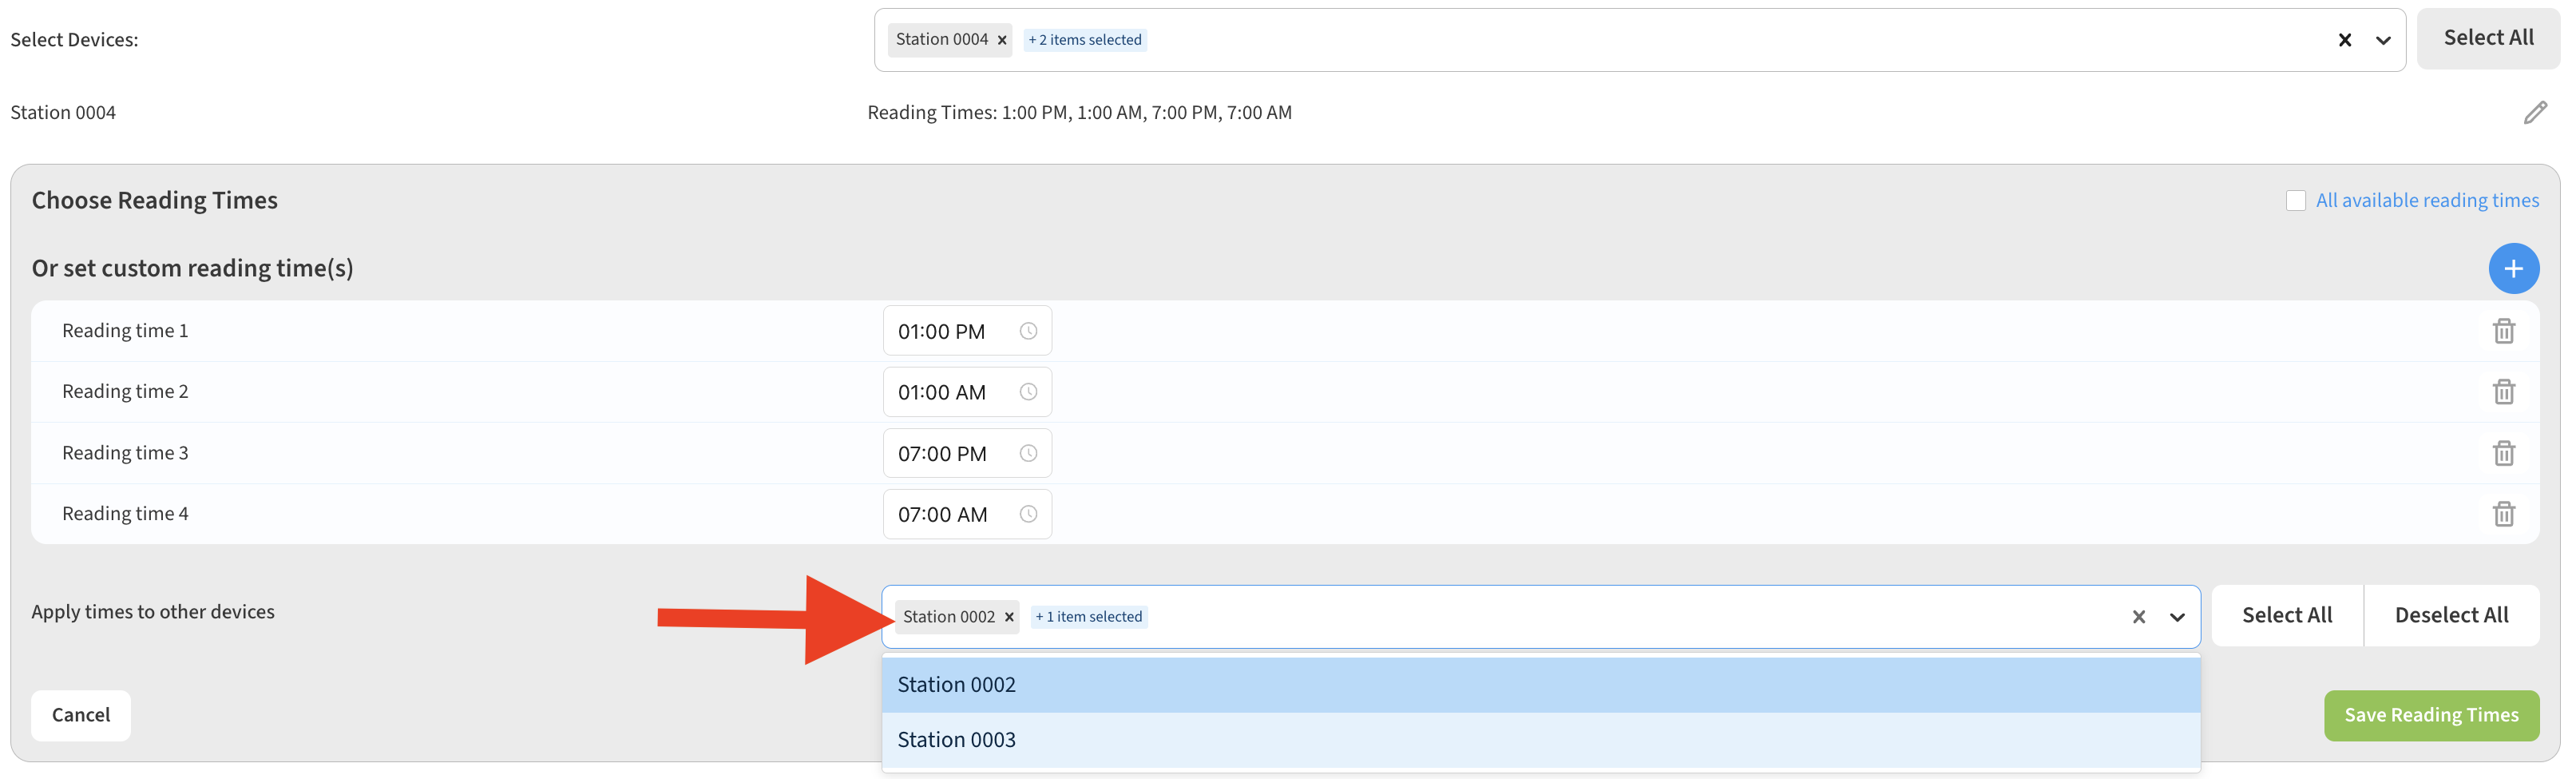
Quickly applying the choice to other devices
If you are setting up multiple data points, you can use the Apply Times to Other Devices control to easily apply your changes to other devices in the report.

Be sure to remember to click the Save Reading Times button when you’re done making your data selections! And don’t forget to use the Report’s Save button in the lower-right to save the changes to your report.