
Create new Webhook Integration
The Webhook Integration allows you to receive notification callbacks triggered by updates within your account’s data, alerts and information.
This integration can provide notifications for the following event information: Sensor data received (uplink), gateway keepalive (ping), and alert events. You can configure event types desired in the Event Subscriptions field
Creating a new Webhook
Use the following steps to setup your new Webhook integration from your dashboard account.
Remember that a Webhook set up while logged into an end-user account will only forward data for locations where that user account has the Admin role.
If you add an integration and you have any other role (Owner, Can View, Can Edit) for a location, you will not receive integration callbacks for those devices. Instead, locate the Admin user for that location in the ☰ → CONTACTS screen and have them add the integration there.
Log into your app dashboard account.
Go to ☰ → INTEGRATIONS and select the Webhook integration, then Connect Webhook
Enter the following information to complete the integration:
Name: Enter a name for this integration. In case you have multiple integrations, this will help uniquely identify it in the list.
Url: Enter the URL that you would like to be called in response to account updates.
(Optional) Headers: Enter headers values in query string format, for example:
CODEX-Api: secret-key Authorization: TokenInput like this:
x-api=my-secret-key&authorization=TokenEvent Subscriptions: In this field you can select whether your integration should pass sensor data received (uplink), gateway keepalive (ping), and alert events. By default all events are selected.
Device Subscriptions: In this field you can select specific devices for the webhook to monitor. By default All Devices are selected.
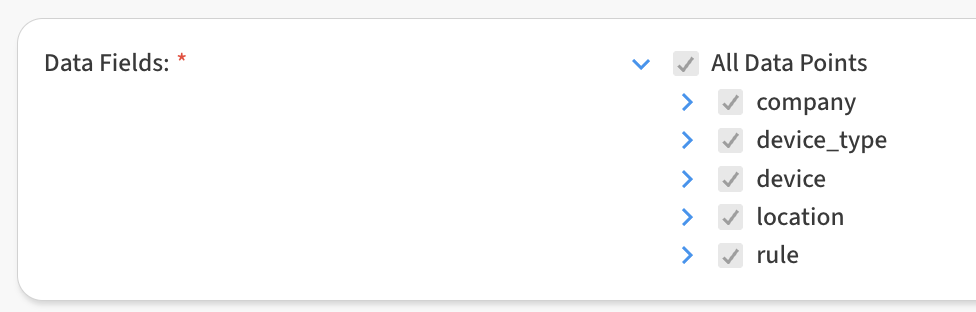
In the Data Fields area, you can customize the specific data points passed by the integration. By default all fields are selected.
Click Save Webhook to finish
After saving the Integration, you will see it shown in your list of integrations.
You can then edit the integration to make any changes needed.
You can also toggle the Integration on/off at any time from here as well. Disabling the integration will stop new data from being sent to the webhook.
Verifying things are working
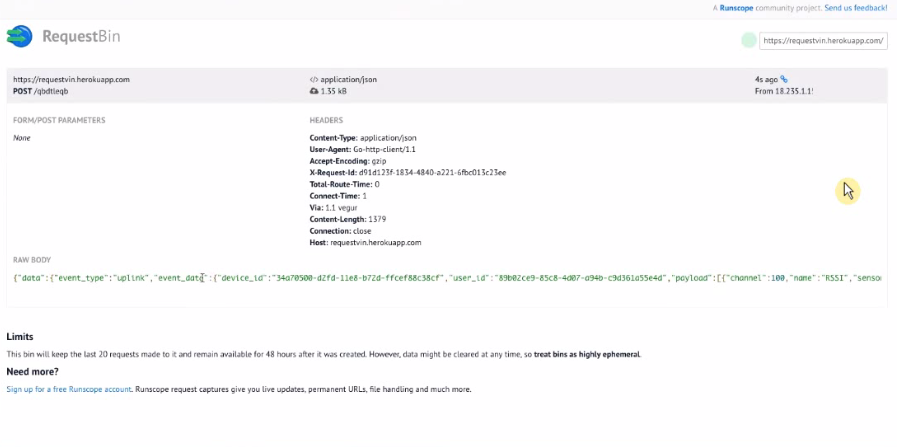
You can verify the Webhook is working by waiting for a new reading to come into your dashboard. As soon as a new event occurs, the Webhook will be notified and include the event payload.
You can also use a temporary service, such as Webhook.site to get a sense of how things work before integrating payload events into your service.
Examples: Payloads & JSON Schema
Uplink Event:
Alert Event:
JSON Schema
Payload Transformation (preview)
The payload transformation is a JavaScript script that can be used to re-structure the outgoing WebHook data.
// Transform webhook payload to non-standard format
//  - 'event' contains the standard JSON schema
//  - 'metadata' contains fuseData/metadata such as company and location.
// The function Transform must return an object, e.g. {"temperature": 22.5}
function Transform(event, metadata) {
    var body = {};

    event.payload.forEach(function(item) {
      body[item.name] = item.value;
    });

    // { "temp": 23, "hum": 75, "rssi": -110 }
    return body;
}